一、Spring Boot 入门
Spring Boot 来简化Spring应用开发的一个框架,约定大于配置
Spring Boot 的底层用的就是Spring
访问官网:spring.io再点击projects
1.背景
问题
J2EE笨重的开发,繁多的配置、低下的开发效率、复杂的部署流程,第三发技术集成难度大。
解决
Spring全家桶时代
Spring Boot -> J2EE一站式解决方案
Spring Cloud ->分布式整体解决方案
优点
快速创建独立运行的Spring项目以及与主流框架集成
使用嵌套式的Servlet容器,应用无需打成WAR包
starters自动依赖与版本控制
大量的自动配置简化开发,也可修改默认值
无需配置XML,无代码生成,开箱即用
准成产环境的运行时应用监控
与云计算的天然集成
微服务简介
微服务:架构分格
一个应用应该是一组小型服务;可以通过http的方式进行互通
2.环境准备
jdk1.8
maven3.x
intellijIDEA
SpringBoot
- MAVEN设置:
给maven的setting.xml配置文件的profiles标签添加
(F:\jsp\apache-maven-3.6.1-bin\apache-maven-3.6.1\conf)
  	jdk-1.8


	true
    		1.8


	1.8
	1.8
	1.8
2.IDEA的默认修改:
修改IDEA的默认maven ,具体看下面的博客https://blog.csdn.net/weixin_43034040/article/details/103835125
HelloWorld项目
浏览器发送hello请求,服务器接收请求并处理,响应Hello World 字符串
第1步.创建一个maven工程(jar)
create new project ->maven->next
第2步.导入spring boot相关依赖
来到spring boot 官网
    org.springframework.boot
    spring-boot-starter-parent
    1.5.9.RELEASE


        org.springframework.boot
        spring-boot-starter-web
第3步 .编写一个主程序:启动Spring Boot
package com.atguigu;
import org.springframework.boot.SpringApplication;
import org.springframework.boot.autoconfigure.SpringBootApplication;

/**
 * @SpringBootApplication 来标注一个主程序类,说明这是一个Spring Boot应用
 */
@SpringBootApplication
public class HelloWorldMainApplication {
    public static void main(String[] args) {
        //Spring应用启动起来
        SpringApplication.run(HelloWorldMainApplication.class,args);

    }
}
第4步.编写相关的Controller、Service
package com.atguigu.Controller;

import org.springframework.stereotype.Controller;
import org.springframework.web.bind.annotation.RequestMapping;
import org.springframework.web.bind.annotation.ResponseBody;

@Controller
public class HelloController {
    @ResponseBody
    @RequestMapping("/hello")
    public  String hello(){
        return "Hello world";
    }
}
如果很多发那个发都是RESTAPI的方式,即发送数据给浏览器,而不是页面跳转,则@ResponseBody可以放在类外
@ResponseBody
@Controller
public class HelloController {

    @RequestMapping("/hello")
    public  String hello(){
        return "Hello world";
    }
}
@ResponseBody
@Controller
两个合并:@RestController
//@ResponseBody
//@Controller
@RestController
public class HelloController {

    @RequestMapping("/hello")
    public  String hello(){
        return "Hello world";
    }
}
第5步.运行并访问
运行主程序
浏览器输入:http://localhost:8080/hello
第6步.简化部署
就算没有装tomcat环境也可以运行
a.导入插件:
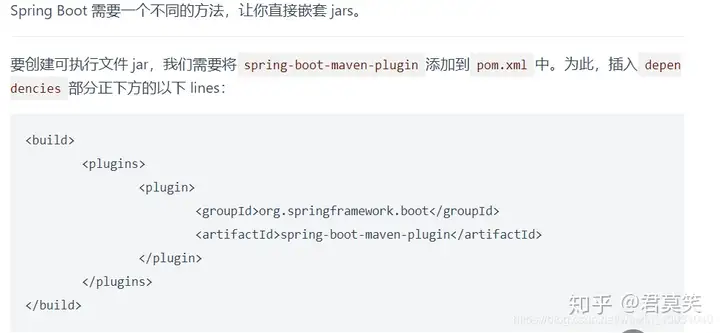
将以下代码添加到pom中
			org.springframework.boot
			spring-boot-maven-plugin
b.打包
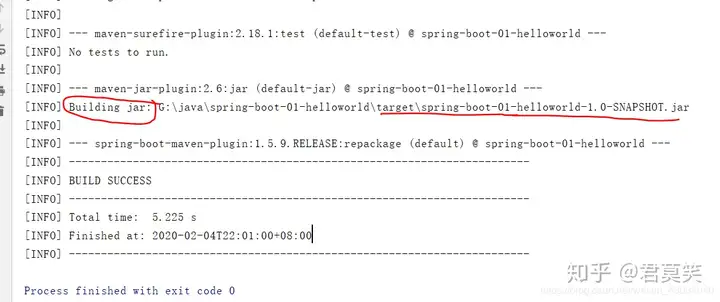
点击Idea右边的maven ->Lifecycle->package
此时maven介入进行打包,打包的地址为
Building jar:
G:\java\spring-boot-01-helloworld\target\spring-boot-01-helloworld-1.0-SNAPSHOT.jar
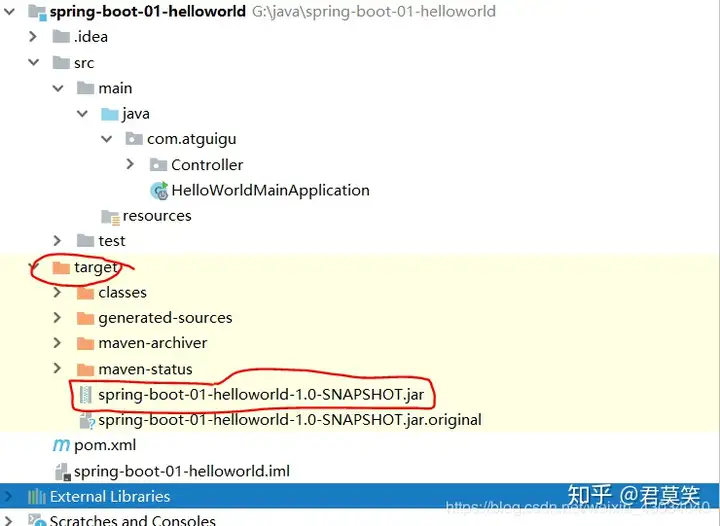
jar包内容:
- BOOT-INF\classes:自己写的类
- BOOT-INF\lib:maven依赖导入的,包含了tomcat
c.命令行运行
在jar包所在目录下,命令行运行:java -jar spring-boot-01-helloworld-1.0-SNAPSHOT.jar
d.浏览器运行
浏览器输入:http://localhost:8080/hello
3.HelloWorld项目解析
POM文件
父项目
        org.springframework.boot
        spring-boot-starter-parent
        1.5.9.RELEASE
查看spring-boot-starter-parent,它也有有父项目
		org.springframework.boot
		spring-boot-dependencies
		1.5.9.RELEASE
		../../spring-boot-dependencies
查看spring-boot-dependencies,有定义了每一个依赖的版本,真正管理Spring Boot应用里的所有应用版本
		5.14.5
		2.7.7
		1.9.59
		1.5.5
		...
		...
		...
导入starters启动器
导入
            org.springframework.boot
            spring-boot-starter-web
spring-boot-starter:spring-boot场景启动器
spring-boot-starter-web:帮我们导入web模块正常运行所依赖的组件。
starters启动器
参考官网:
Spring Boot将所有的功能场景都抽取出来,做成一个个的starters(启动器),只需要在项目里引入这些starter相关的所有依赖都会导入进来。要用什么就导入什么场景启动器。
主程序类,入口类
/**
 * @SpringBootApplication 来标注一个主程序类,说明这是一个Spring Boot应用
 */
@SpringBootApplication
public class HelloWorldMainApplication {
    public static void main(String[] args) {
        //Spring应用启动起来,run()里的类必须是@SpringBootApplication标注的类
        SpringApplication.run(HelloWorldMainApplication.class,args);

    }
}
@SpringBootApplication(即Spring Boot 应用)
进入SpringBootApplication查看发现是组合组件,如下:
Target({ElementType.TYPE})
@Retention(RetentionPolicy.RUNTIME)
@Documented
@Inherited
@SpringBootConfiguration
@EnableAutoConfiguration
@ComponentScan(
    excludeFilters = {@Filter(
    type = FilterType.CUSTOM,
    classes = {TypeExcludeFilter.class}
), @Filter(
    type = FilterType.CUSTOM,
    classes = {AutoConfigurationExcludeFilter.class}
)}
)
public @interface SpringBootApplication {
@SpringBootConfiguration
Spring Boot的配置类
标注在某个类上,表示是一个SpringBoot的配置类,
再点进去
发现@Configuration,这就是spring的配置注解。
@EnableAutoConfiguration
开启自动配置功能;
以前需要配置的东西,现在spring boot帮我们自动配置,查看EnableAutoConfiguration有:
@AutoConfigurationPackage
@Import({EnableAutoConfigurationImportSelector.class})
public @interface EnableAutoConfiguration {
@AutoConfigurationPackage :自动配置包
进去查看:
有@Import({Registrar.class}),是Spring的底层注解,给容器导入自已组件
public void registerBeanDefinitions(AnnotationMetadata metadata, BeanDefinitionRegistry registry) {
AutoConfigurationPackages.register(registry, (new AutoConfigurationPackages.PackageImport(metadata)).getPackageName());
}
将主配置类(@SpringBootApplication标注的类)的所在包及下面所有子包里面的所有组件扫描到Spring容器;
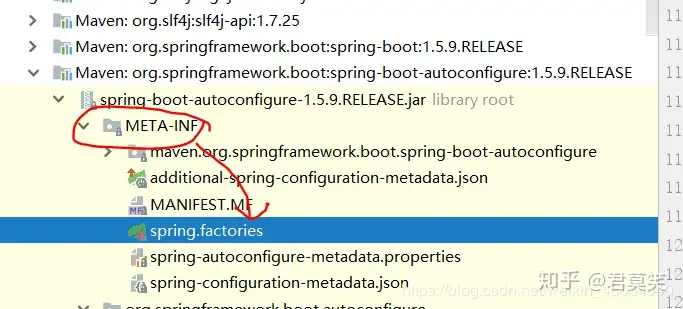
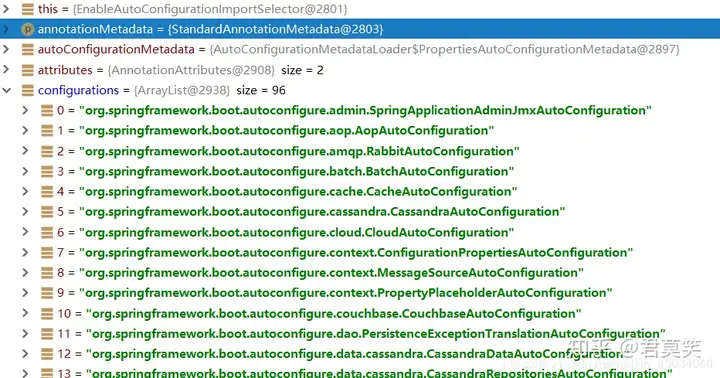
@Import({EnableAutoConfigurationImportSelector.class}):导入哪些选择器,将所有需要导入的组件以全类名的方式返回;这些组件会被添加到容器中;会给容器导入非常多的(见下图)自动配置类(xxxAutoConfigration);就是给容器中导入这个场景组要的所有组件,并配置包这些
extends AutoConfigurationImportSelector
public String[] selectImports(AnnotationMetadata annotationMetadata) {
4.使用Spring Initialier快速创建Spring Boot项目
选择我们需要的模块,向导会联网创建Spring Boot项目。
步骤
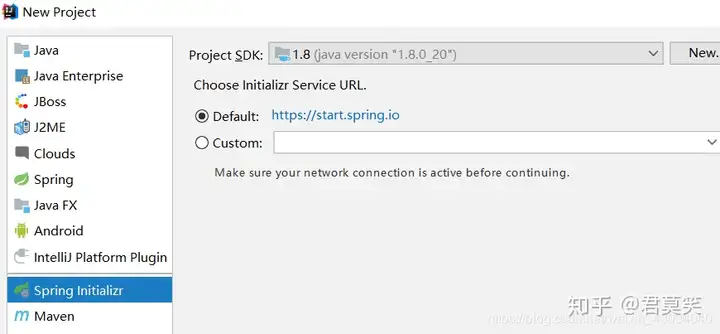
选择Spring Initialier
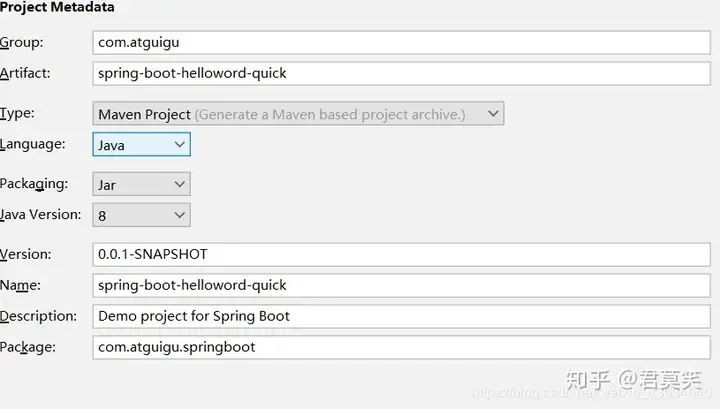
输入Group、Artifact和 package
选择功能模块
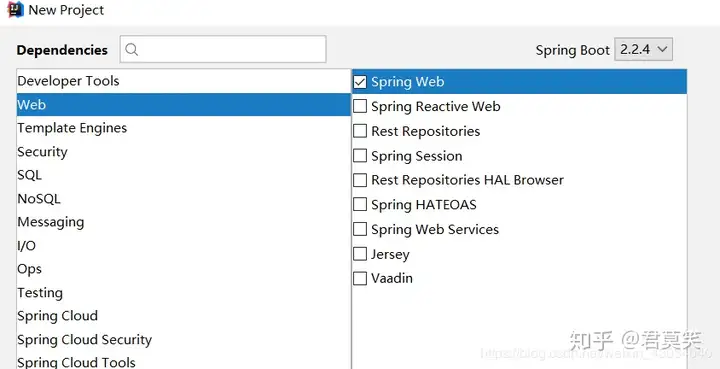
删除多余的
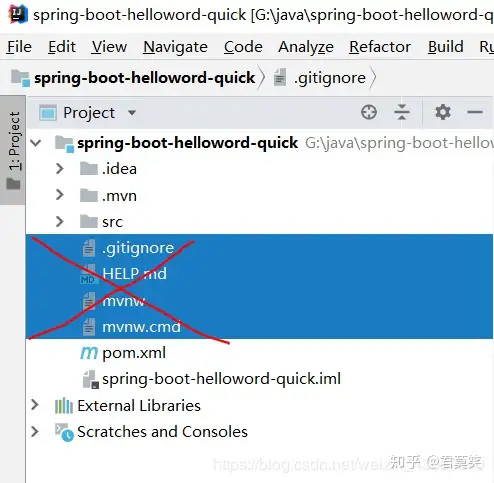
失败了,先跳过。
哈哈,我知道代替方法了,
1.使用https://start.spring.io/生成有错误的的代码,错误之处在于版本,不知版本哪里错了,以后再说哦。
2。将版本改为1.5.9.RELEASE
出现问题:
Error:(3, 29) java: 程序包org.junit.jupiter.api不存在
解决:点击test,导入
自动增加的内容
默认生成的Spring boot 项目:
主程序已经生成好了,我们只需要我们自己的逻辑
resources文件夹中目录结构
static:所有的静态资源;js,css,图片
templates:保存所有的模板页面;(Spring Boot默认jar包使用嵌套式的Tomcat,默认不支持JSP页面);可以使用模板引擎
application.properties:Spring Boot 应用的配置文件
想更改端口号:
application.properties文件里添加:
server.port=8081二、配置文件
1.配置文件
SpringBoot使用一个全局的配置文件,配置文件名是固定的。
application.yml
配置文件的作用:修改SpringBoot自动配置的默认值;
YAML( YAML Ain`t Markup Language)
YAML A Markup Language:是一个标记语言
YAML isn`t Markup Language:不是一个标记语言
标记语言:
以前的配置文件大多是xxx.xml文件;
YAML:UI数据为中心,比json和xml更适合做配置文件
想更改端口号的三种文件方式
properties:
server.port=8081YAML:
server :
  port : 8081
XML:
8081
比较:XML造成大量文件空间的浪费,YAML非常简洁
2.YAML语法
1.基本语法
k(空格):(空格) v 表示一对键值对以空格的缩进来控制层级关系;只要左对齐的一列数据,都是同一层级的。
server :
  port : 8081
  path : /hello
属性和值是大小写敏感的
2.值的写法
字面量 : 普通的值(数字,字符串,布尔)
k : v字符串默认不加单引号或者双引号;
- 双引号:不会转义字符串里面的特殊字符
- 单引号:会转义
对象、Map(属性和值)(键值对):
v是对象时
friends :
	lastName : zhangsan
	age : 20
或者行内写法
friends : {lastName : zhangsan , age : 20}数组(List、Set)
用 – 值表示数组中的一个元素
pets:
 - cat
 - dog
 - pig
或者行内写法
pets: [cat,dog,pig]3.@ConfigurationProperties
yaml和properties的写法项目参考:G:\java\spring-boot-02-config-2
4.@Value
在spring基础中
@Value就是上面代码的value
@Value的使用
使用了@Value后就不需要写@ConfigurationProperties
//@ConfigurationProperties(prefix = "person")
public class Person {
@Value("${person.last-name}")
private String lastName;
@Value("{11*2}")
private int age; 代表22
private Date birth;
@Value("true")
private boolean boss;
private Map maps;
private List2. 分享目的仅供大家学习和交流,您必须在下载后24小时内删除!
3. 不得使用于非法商业用途,不得违反国家法律。否则后果自负!
4. 本站提供的源码、模板、插件等等其他资源,都不包含技术服务请大家谅解!
5. 如有链接无法下载、失效或广告,请联系管理员处理!
6. 本站资源售价只是赞助,收取费用仅维持本站的日常运营所需!
7. 如遇到加密压缩包,请使用WINRAR解压,如遇到无法解压的请联系管理员!
8. 精力有限,不少源码未能详细测试(解密),不能分辨部分源码是病毒还是误报,所以没有进行任何修改,大家使用前请进行甄别
丞旭猿论坛


暂无评论内容